Chrome Exhaust Tips / Aluminum Door Sills?

William330

Active Member
Messages
944
Likes
7
Location
USA
#1
Has anyone added the chrome exhaust tips to the exhaust pipe? There are
two exhaust pipes, and I've seen EOM parts priced at $60 to $200. I think the
$60 part ($30 x 2) is the correct part.

Has anyone ordered this? How much should it cost? Easy installation?

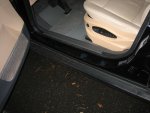
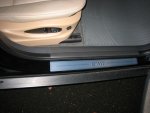
I'd also like to get the aluminum door sills, has anyone ordered those? They're
only $18 and have an "M" in the middle. Seems like a no brainer over the barren
paint door sill.

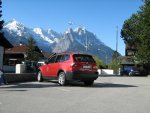
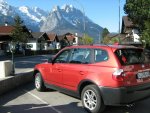
(It's a 2004 X3 3.0i)
 
Messages
405
Likes
4
Location
Los Angeles, CA
#5
hmmm... so the bolt holds it in place without any drilling? i just bought a pair of chrome exhaust tips for $40 from bav auto. i haven't had a chance to install them yet... but, it almost looks like u have to drill a hole for the nut & bolt to fasten securely- no?

if u could take a close-up photo showing the underside and where/ how the bolt fastens, i would appreciate it.

thanks! :)
 

William330

Active Member
Messages
944
Likes
7
Location
USA
#11
Interesting. My 330ci chrome tips just slide on -- no screw.

Thanks for the updates on the X3 tips, I'll order them up from the
dealer, and let folks know how it goes.
 

William330

Active Member
Messages
944
Likes
7
Location
USA
#12
Just installed the BMW chrome exhaust tips today.

They have a screw in the bottom like the one pictured above -- hope they
don't come loose and fall off! :)

They look good, definitely worth the money.

The aluminum door sills are nice, just picked those up today as well, but
didn't install yet. They're a no-brainer at $45 for the front and rear doors.
I think they'll make a huge difference.

I'll post before/after pics when I install them this weekend.

Also, the plastic door sill piece that your foot hits when you get into the
car, is $10. Also a no-brainer buy, in my opinion, if you have scuffs and
scratches on yours.
 

William330

Active Member
Messages
944
Likes
7
Location
USA
#13
Installed the aluminum door sills today, and they look pretty sharp!

Before and after pics are below. The first two are the front, the second two are the rear.

Some notes on installation (there are no directions supplied).

  • Clean the original painted door sill with Windex or similar to remove any wax, moisture, dirt, etc. Wipe painted door sill with a clean and dry cloth after, to remove any moisture or residue from cleaning.

  • Test position the pieces before peeling off the paper covering the adhesive. I lined them up with the seam in the plastic sill piece, since that was both the center, and where it was flat. Both front and back were lined up with the seam (see photos). Make sure the new aluminum sill sits on flat area, and doesn't extend past any curved areas of the body.

  • The double-stick glue on the pieces is incredibly strong, once you touch it to the paint, that's where it will remain forever. Make sure you carefully place it where you want it, the first time!

  • Once stuck to the vehicle, to ensure good bonding, use a doubled-up soft clean rag and press down hard on every inch of the new sill with your palm on top of the rag. I pressed hard, moved an inch, pressed hard again, moved an inch, etc. Repeat until you've covered the entire surface. (Also, leave the clear protective plastic on while pressing, to avoid scratches.

  • There is a clear plastic covering the aluminum face (it's still on in the photos), and should be removed when you are finished.
 

Attachments


Top